NotificationX PRO allows you to integrate YouTube and lets you show your YouTube video activities popups on your WordPress sites. This is helpful for increasing engagement of your YouTube channel and gaining more credibility.
To display video activities popups with NotificationX、 you need to retrieve the API key first. Follow the steps below to display YouTube video activities popups with NotificationX.
How To Configure YouTube Video Activities Popups? #
Once you are done retrieving the API key, it is time to configure YouTube with NotificationX. Go through the step-by-step guide below to configure YouTube video activity popups with NotificationX.
注意: Before you start, ensure you have the free and PRO version of NotificationX installed and activated on your website as this is a premium feature.
Step 1: Login To Your WordPress Dashboard #
After you log in to your WordPress dashboard, go to ‘NotificationX’ → ‘Settings’ → ‘API Integrations’. Scroll down to ‘YouTube Settings‘.

Step 2: Paste The YouTube API Key #
In the next step, you need to paste the API key you copied earlier in the ‘APIキー’ field. Once done, hit ‘Validate’

How To Show Video Engagement Popups With NotificationX? #
It’s time to create video engagement popups with NotificationX now. To create a video engagement notification, follow these quick steps.
ステップ1:新しい通知を作成する #
Now, click on ‘Add New’ to create a new notification. Select ‘Video’ as the Notification Type, choose YouTube as the Video Source, and hit '次'.
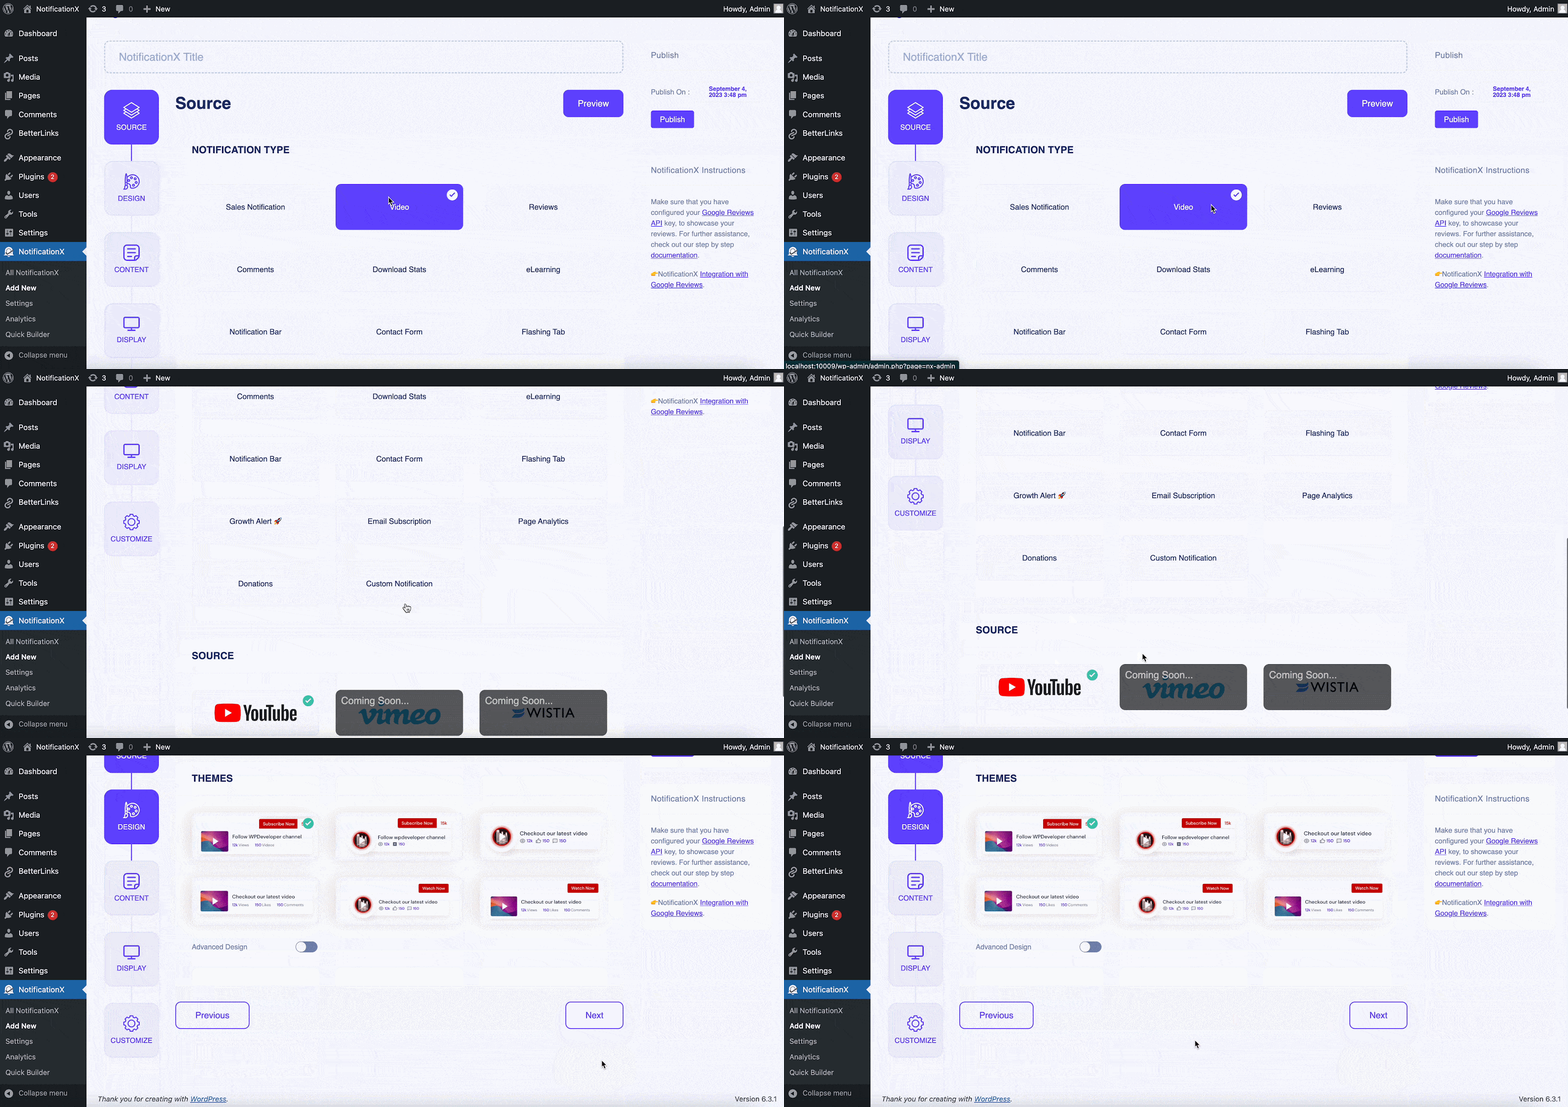
Step 2: Choose The Design Theme #
から '設計' tab, choose the design from the ready themes you prefer. Enable 「高度なデザイン」 if you want to customize the styling and appearance of the template. Move to the '次' step when done.
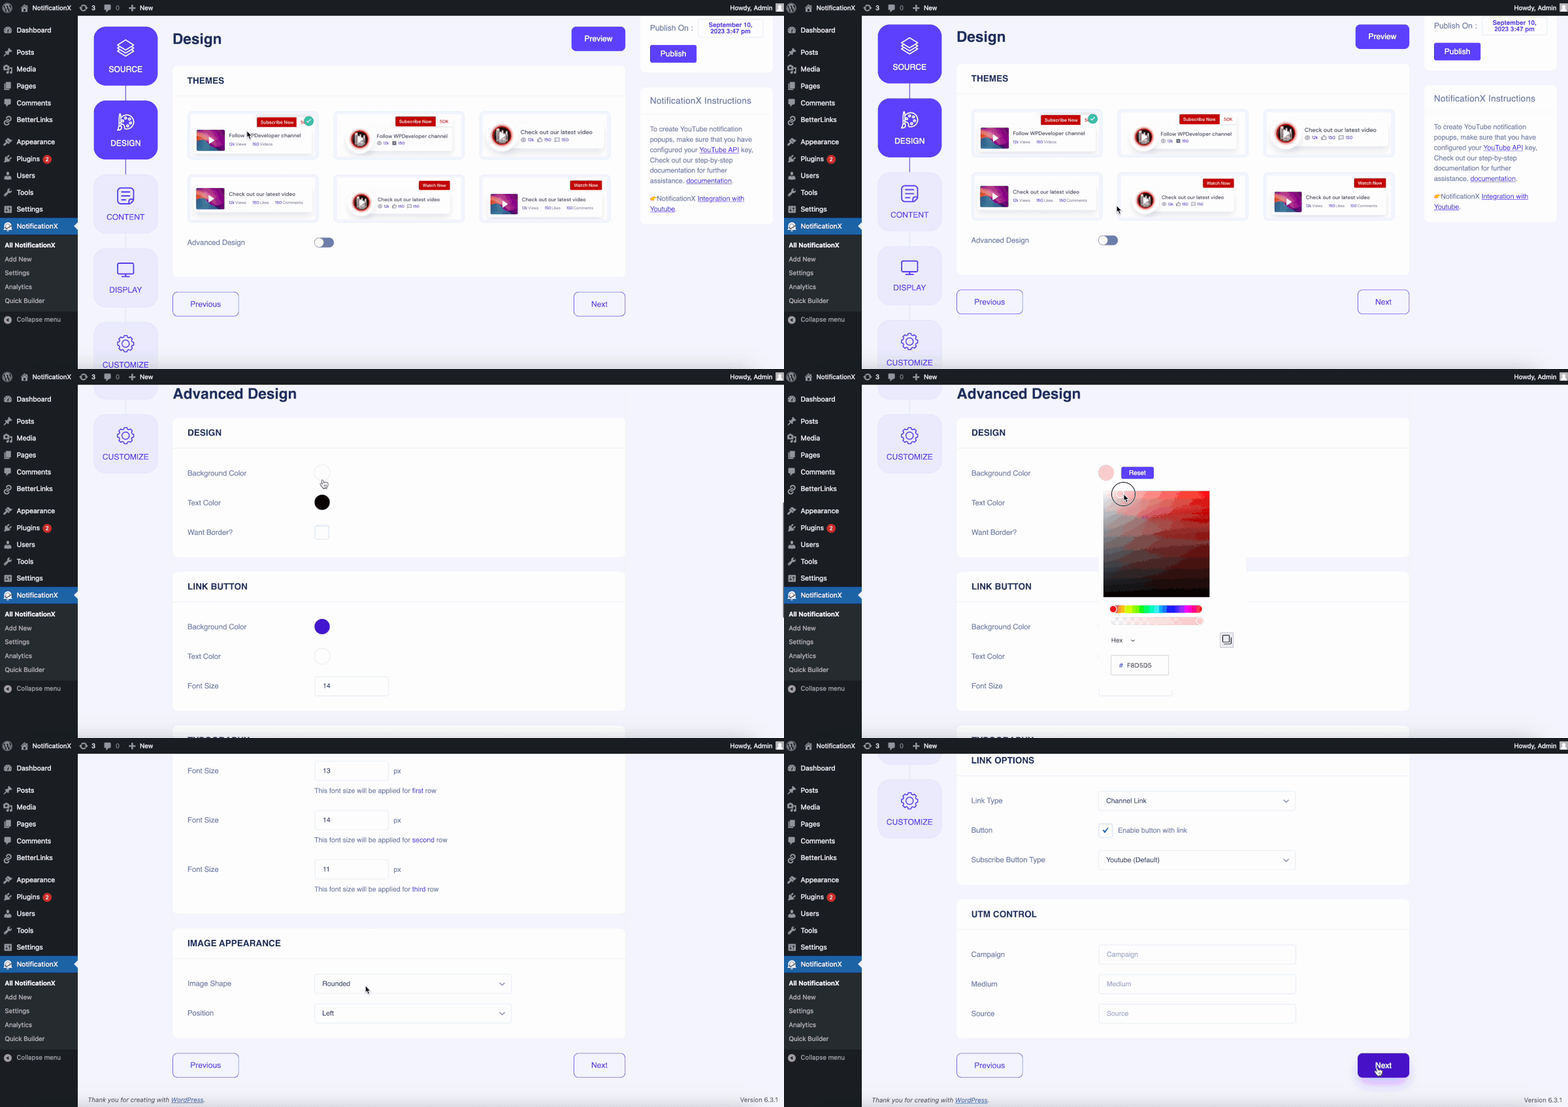
Step 3: Customize Content And Configure Link Settings #
から 'コンテンツ’ section, add the YouTube Channel ID or Username in the respective field. Personalize the notification content as preferred. From the ‘リンクオプション’, choose ‘リンクタイプ’ and check ‘Enable button with link’ if needed. Move to the next step.
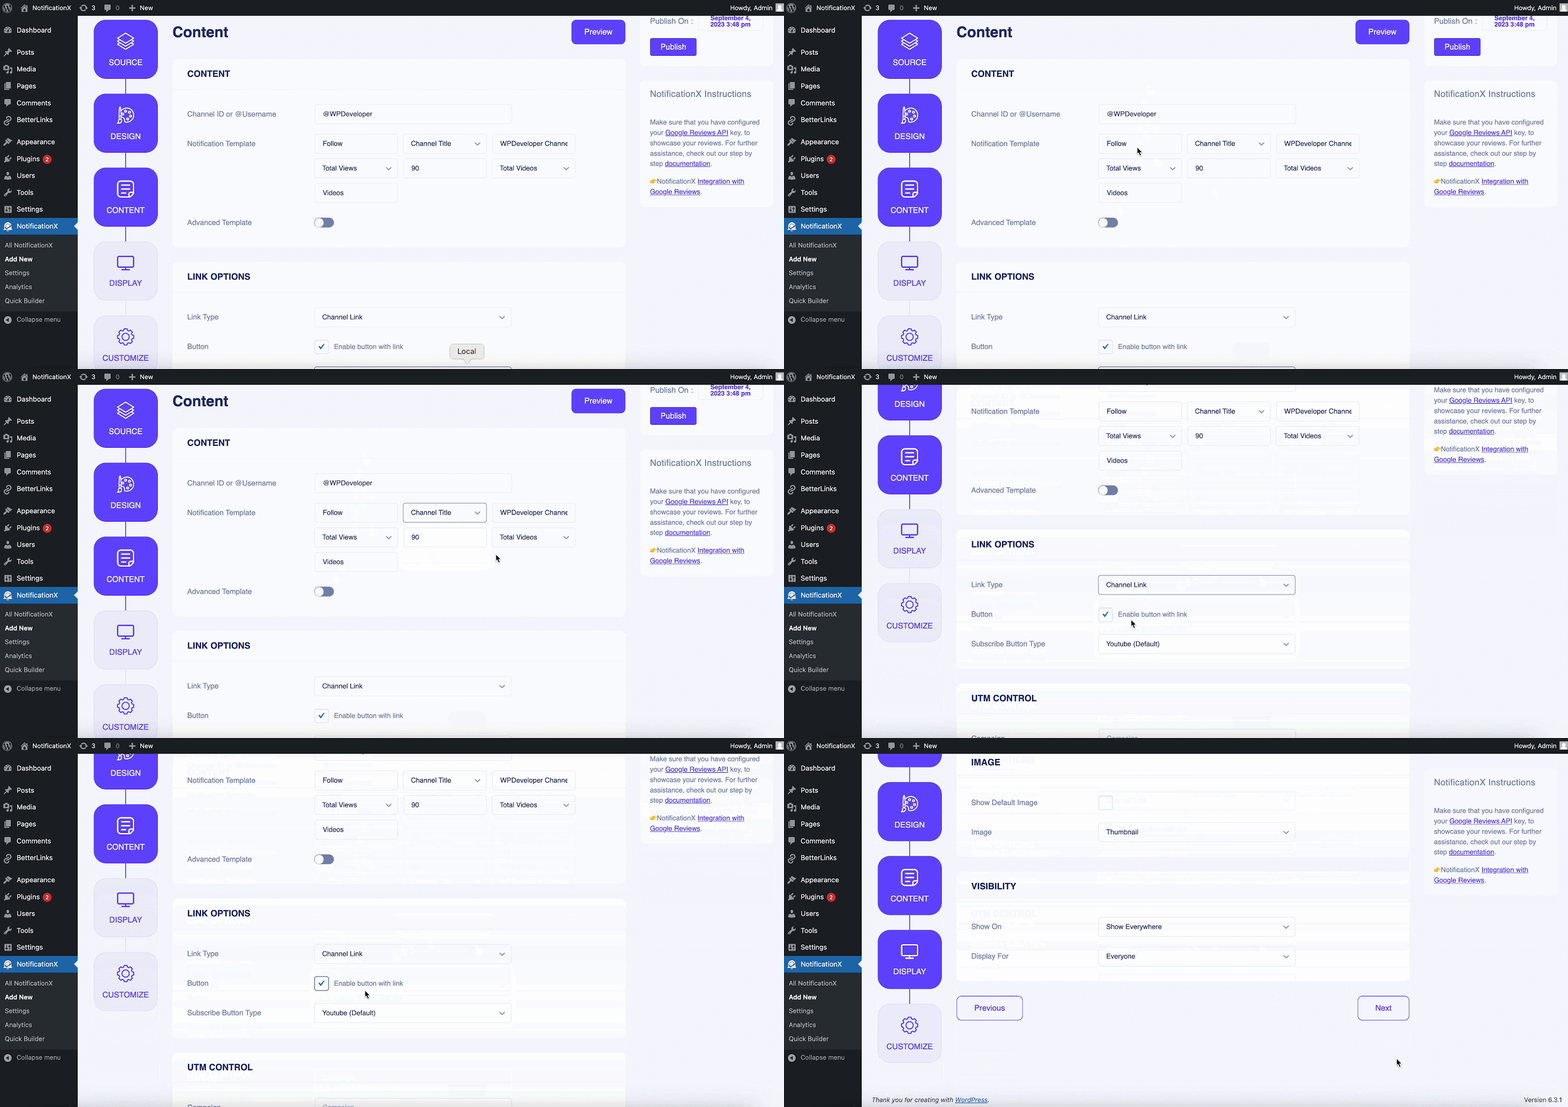
Step 4: Configure Display Settings #
から '表示' tab, choose if you want to display the image along with the notification. In the 「可視性」 section, there are options to control which pages of your website you want to show the popup notification.
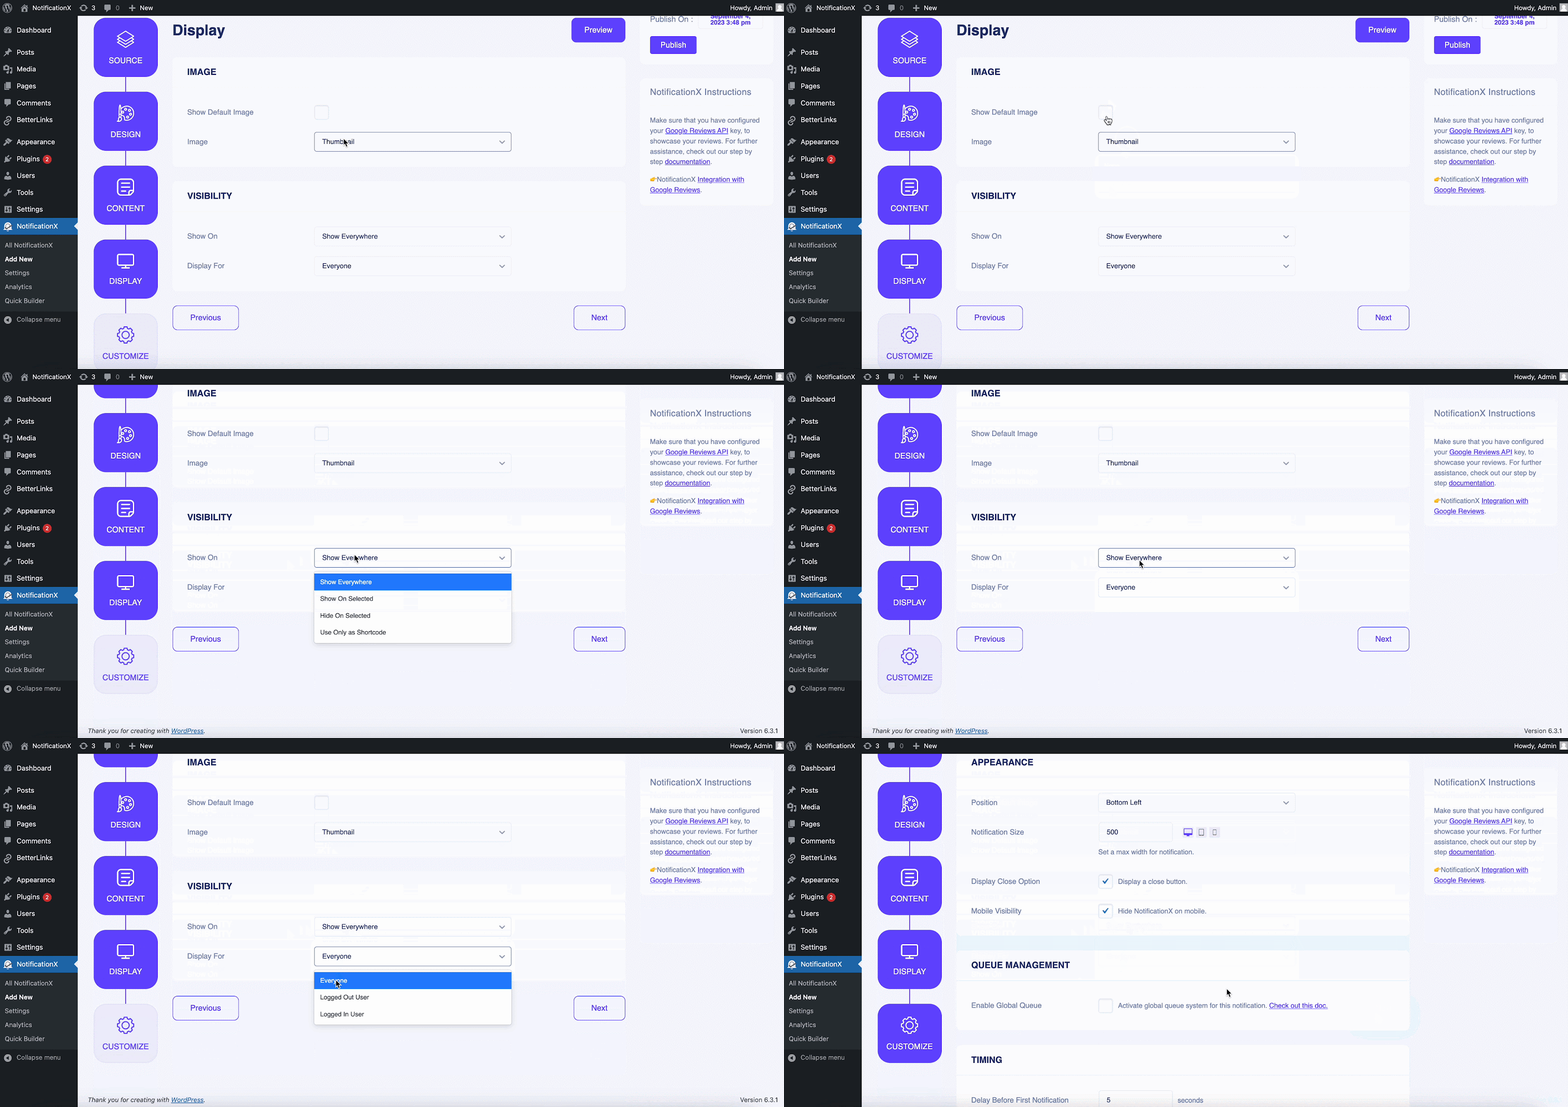
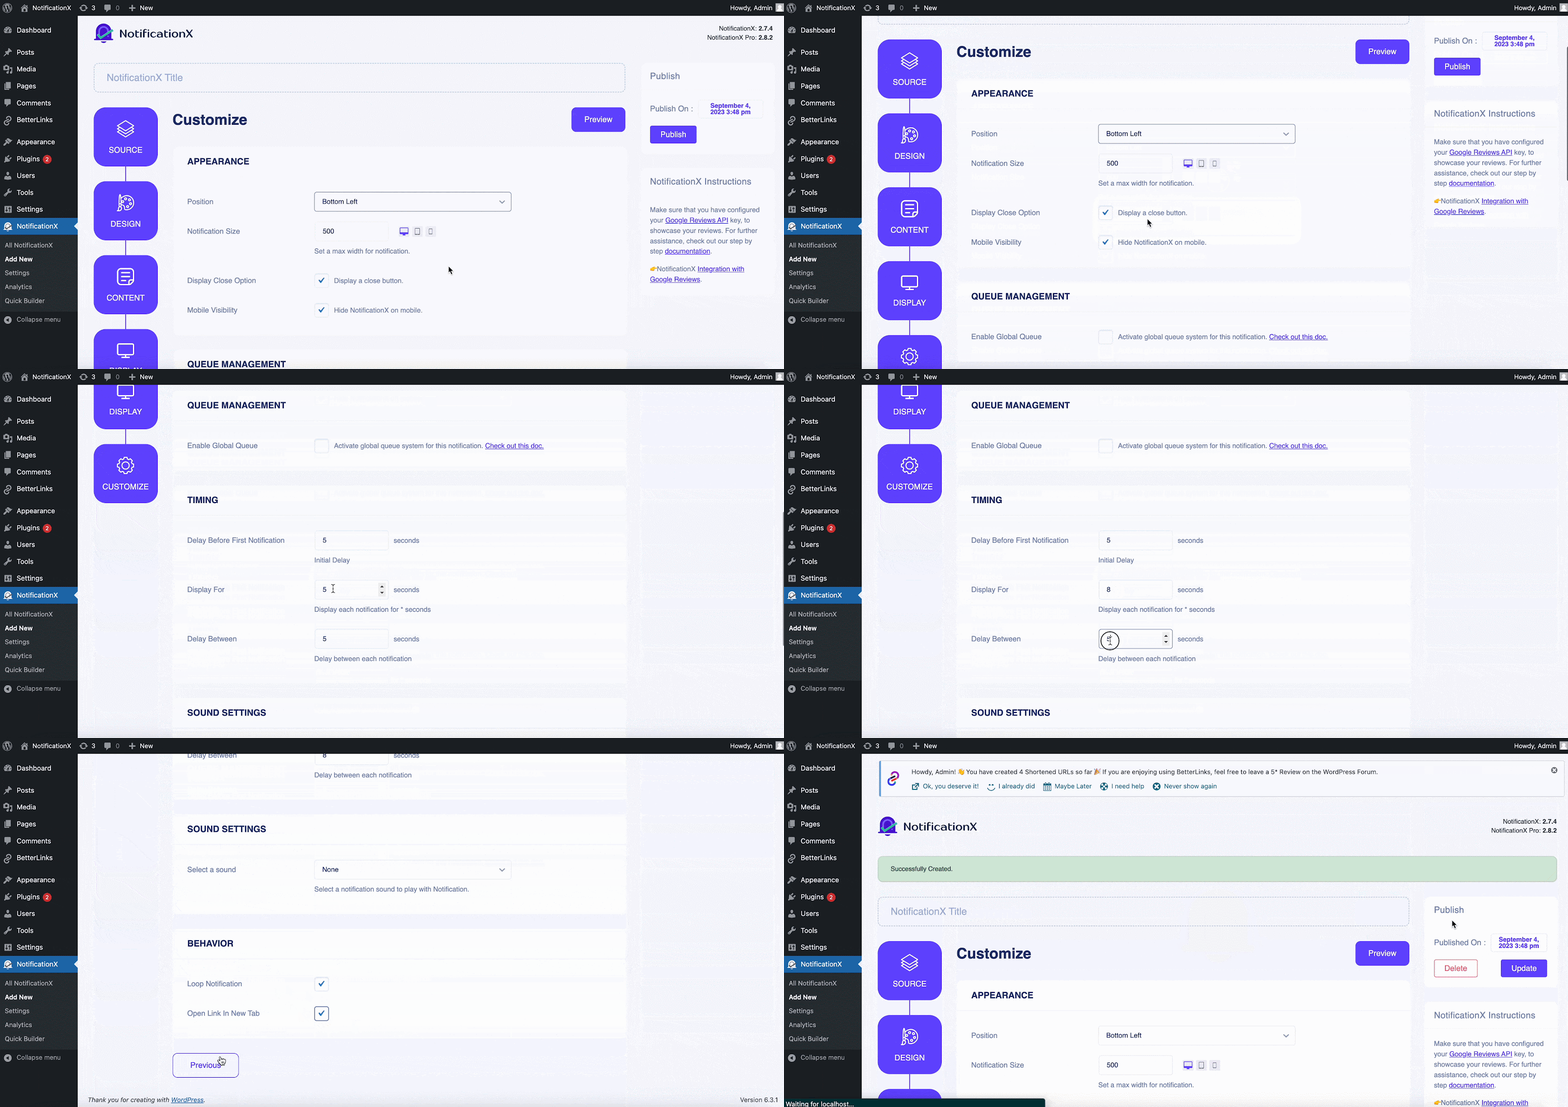
Step 5: Customize Appearance And Configure Timing #
In the ‘カスタマイズ’ tab, there are more options to configure your notification settings. From the '外観' section, choose the position of the notification. Set timings for the notification as preferred. Click on 「公開」 once you are done.
Let’s have a quick glimpse at what your newly created YouTube video engagement popup looks like on your website.
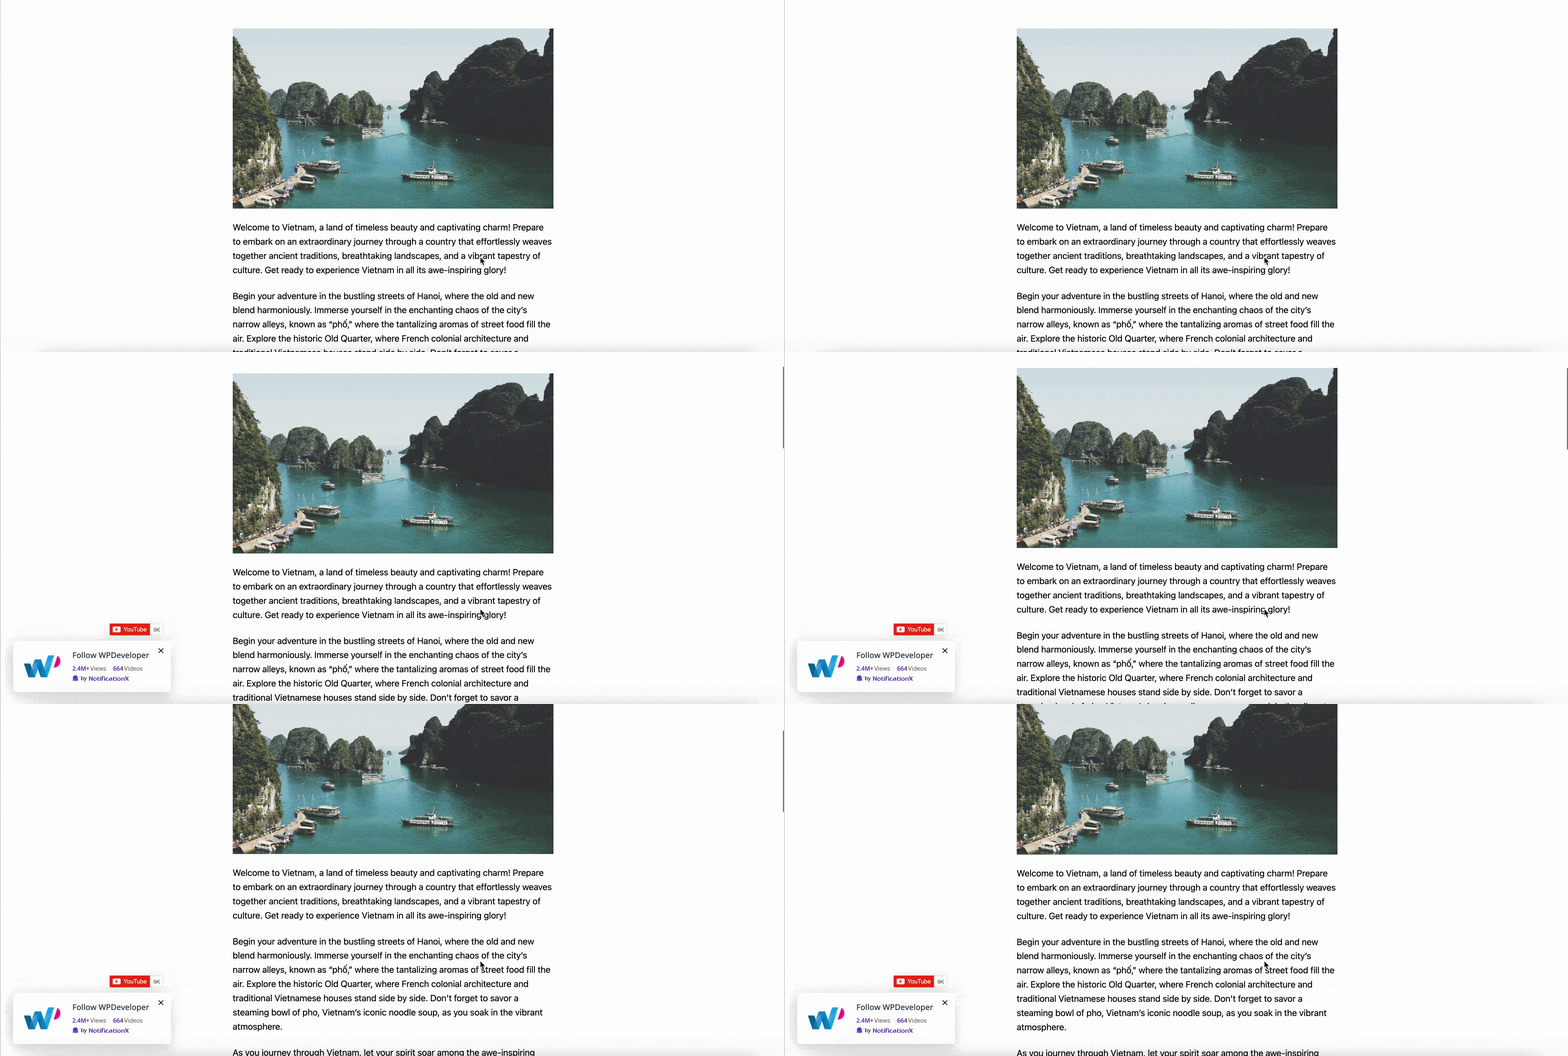
Thus, following the easy steps, you can create video engagement popups with using NotificationX. Getting stuck? Feel free to reach out to our support team さらなる支援のため。


